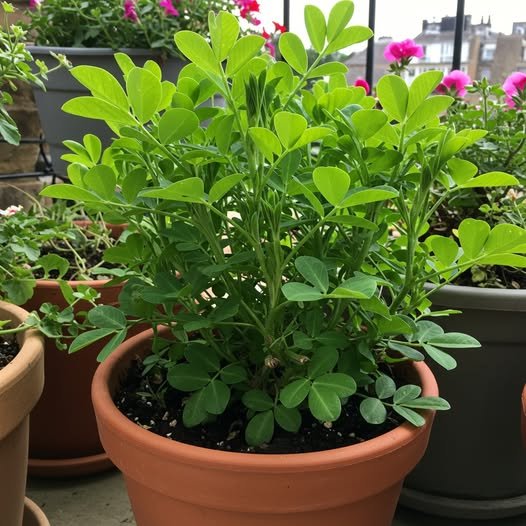
Peanuts are a highly nutritious and delicious crop that can be grown at home, even in limited spaces. While they are typically grown in fields, it is entirely possible to cultivate peanuts in plastic bottles with high yields. This method is perfect for small gardens, balconies, or urban apartments, allowing you to enjoy fresh, homegrown peanuts with minimal effort.
In this guide, we will walk you through the step-by-step process of growing peanuts in plastic bottles, from preparation to harvest, ensuring you get the best yield possible.
1. Why Grow Peanuts in Plastic Bottles?
Using plastic bottles to grow peanuts has several benefits, including:
- Space Efficiency: Ideal for those without a garden.
- Eco-Friendly: Repurposes plastic waste into a productive garden.
- Easy Maintenance: Requires minimal effort and care.
- Pest Control: Reduced exposure to soil-borne pests.
- Fun and Rewarding: A great gardening project for beginners and experienced gardeners alike.
2. Choosing the Right Peanuts for Planting
Not all peanuts are suitable for home growing. Here are some tips on selecting the right variety:
- Use Raw Peanuts: Avoid roasted or processed peanuts as they will not germinate.
- Organic Peanuts Preferred: Store-bought raw peanuts often have growth inhibitors, so organic varieties are best.
Best Peanut Varieties: Spanish, Valencia, and Virginia peanuts are great for container growing.
3. Materials Needed
Before starting, gather the following materials:
- Plastic bottles (2L soda bottles or larger)
- Sharp knife or scissors (for cutting the bottles)
- Nail or drill (for drainage holes)
- High-quality potting mix (loamy and well-draining)
- Raw peanut seeds (unshelled for best results)
- Watering can or spray bottle
- Fertilizer (organic compost or balanced NPK fertilizer)
- Sunny location (peanuts require full sun, at least 6 hours per day)
4. Step-by-Step Guide to Growing Peanuts in Plastic Bottles
Step 1: Preparing the Plastic Bottles
- Cut the bottle – Remove the top section to create an open-top planter.
- Poke drainage holes – Make small holes in the bottom to prevent waterlogging.
- Fill with soil – Use nutrient-rich, well-draining potting soil mixed with compost.
Step 2: Germinating the Peanut Seeds
- Soak raw peanuts in water for 24 hours to speed up germination.
- Plant directly into the prepared bottles, about 1-2 inches deep.
- Water lightly to keep the soil moist but not soggy.
- Place in a sunny spot – Peanuts thrive in warm temperatures (70-85°F or 21-29°C).
- Wait for sprouts – Seedlings should appear in 7-10 days.
Step 3: Caring for Peanut Plants
Watering:
- Peanuts require moderate moisture; water when the top inch of soil feels dry.
- Avoid overwatering, as soggy soil can cause root rot.
Sunlight:
- Ensure the plants receive at least 6-8 hours of direct sunlight daily.
Fertilization:
- Apply organic compost or a balanced fertilizer (5-10-10) every 3-4 weeks.
- Peanuts naturally fix nitrogen, so they don’t need too much nitrogen-rich fertilizer.
Mulching:
- Adding a thin layer of mulch helps retain moisture and regulate temperature.
Step 4: Encouraging High Yields
- Hilling Method:
- When the plant reaches about 6 inches tall, add more soil around the base.
- This encourages the development of more peanut pegs (the part that grows into peanuts).
- Flowering and Pegging:
- Peanuts produce yellow flowers that develop into pegs, which push into the soil.
- Make sure there is enough loose soil for the pegs to penetrate.
- Pruning:
- Remove weak stems to promote stronger growth and better yields.
5. Harvesting Peanuts in Plastic Bottles
Peanuts take about 100-130 days to mature. Here’s how to know when they’re ready:
- Leaves Turn Yellow: This is a sign that the peanuts are fully developed.
- Checking Readiness: Carefully dig into the soil to check if the pods are mature.
- Harvesting Process:
- Gently pull the plant out of the bottle.
- Shake off excess soil and allow the peanuts to dry for a few days.
- Cure them in a warm, dry place for 2-3 weeks before eating or storing.
6. Common Problems and How to Solve Them
| Problem | Cause | Solution |
|---|---|---|
| Peanuts not germinating | Old or processed seeds | Use fresh, raw peanuts |
| Yellowing leaves | Overwatering or poor drainage | Ensure good drainage and adjust watering |
| No peanuts forming | Lack of sunlight or compacted soil | Provide full sun and loosen soil |
| Pests (aphids, mites) | Common garden pests | Use neem oil or insecticidal soap |
7. Benefits of Growing Peanuts in Plastic Bottles
Growing peanuts at home has numerous advantages:
- Fresh and Organic: No pesticides, just natural homegrown goodness.
- Saves Money: No need to buy store-bought peanuts.
- Educational: A fun way to learn about plant growth and sustainability.
- Eco-Friendly: Repurposes plastic waste into a productive garden.
- Compact & Convenient: Perfect for urban gardening and small spaces.
Final Thoughts: Start Growing Peanuts Today!
Growing peanuts in plastic bottles is an innovative, space-saving way to enjoy fresh, homegrown peanuts. With the right care, you can achieve a high yield in a small space while reducing plastic waste. Whether you’re an experienced gardener or a beginner, this method is easy, rewarding, and fun.
So why not start today? Grab some plastic bottles, plant your peanut seeds, and watch as your mini peanut farm flourishes!