Peanuts are a nutritious and versatile crop enjoyed in many households. Growing them at home is not only cost-effective but also ensures a fresh, organic supply for your family. While many gardeners are familiar with traditional methods of planting peanuts, there is a lesser-known technique that yields larger and more abundant tubers. By following this innovative method, you can maximize your peanut harvest even in a small space. This guide will walk you through the steps to growing peanuts successfully at home using this unique approach.
Why Grow Peanuts at Home?
Nutritious & Healthy: Peanuts are packed with protein, healthy fats, and essential nutrients.
Cost-Effective: Growing your own peanuts saves money and ensures a fresh supply.
Eco-Friendly: Homegrown peanuts reduce reliance on store-bought, packaged varieties.
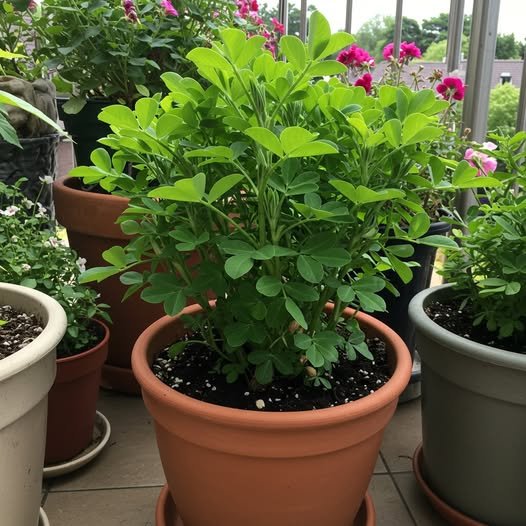
Space-Efficient: With the right method, you can cultivate peanuts even in small gardens or containers.
Fun & Educational: Great for involving children in gardening and learning about plant growth.
Materials Needed for Growing Peanuts
To start growing peanuts at home, gather the following materials:
Raw peanut seeds (unsalted and unroasted)
Well-draining soil (sandy or loamy preferred)
Organic compost or fertilizer
Raised bed, garden plot, or large containers
Mulch (straw or dried leaves)
Watering can or hose
Garden rake and trowel
Wooden stakes or markers (optional)
Step-by-Step Guide to Growing Peanuts
Step 1: Selecting the Right Peanut Variety
There are different types of peanuts, but the most commonly grown ones include:
- Runner Peanuts: High-yielding and commonly used for peanut butter.
- Virginia Peanuts: Large-sized nuts, great for roasting.
- Spanish Peanuts: Small but rich in oil content.
- Valencia Peanuts: Sweet-tasting with multiple kernels per shell. Choose a variety that suits your growing conditions and intended use.
Step 2: Preparing the Soil
- Choose a Sunny Spot: Peanuts require full sunlight for at least 6-8 hours a day.
- Loosen the Soil: Use a rake or trowel to loosen the soil up to 12 inches deep.
- Improve Drainage: Ensure the soil is sandy and well-draining to prevent waterlogging.
- Add Organic Matter: Mix compost or aged manure to enrich the soil with nutrients.
- Create Raised Rows: Form small raised beds or ridges to enhance drainage and encourage root expansion.
Step 3: Planting Peanut Seeds
- Soak the Seeds: Soak raw peanut seeds in water overnight for faster germination.
- Space the Seeds: Plant seeds 1-2 inches deep and 6 inches apart in rows that are 18-24 inches apart.
- Cover with Soil: Lightly cover the seeds with loose soil and pat down gently.
- Watering: Water thoroughly after planting to keep the soil moist but not soggy.
Step 4: Caring for Peanut Plants
- Watering: Keep the soil consistently moist, especially during flowering and pod formation.
- Mulching: Apply a layer of straw or dried leaves to retain moisture and prevent weed growth.
- Fertilizing: Apply organic fertilizer or compost every 3-4 weeks to promote healthy growth.
- Weeding: Remove weeds carefully to avoid disturbing the developing peanut pods.
- Pest Control: Monitor for pests like aphids and caterpillars, using neem oil or natural insecticides if necessary.
Step 5: Encouraging More Tubers with Mounding
One secret to growing large and abundant peanut tubers is mounding. When peanut plants begin to flower, they produce “pegs” that grow downward into the soil and develop into peanuts. To encourage more tubers:
- Wait for Pegging: When you see pegs forming, add a layer of loose soil or compost around the base of the plants.
- Mound the Soil: Gently pile up soil around the plants to help cover the pegs.
- Repeat as Needed: Continue mounding every couple of weeks to support peanut growth.
Step 6: Harvesting Your Peanuts
- Check for Readiness: Peanuts are ready for harvest in 90-120 days, when leaves start turning yellow.
- Loosen the Soil: Use a garden fork or shovel to gently loosen the soil around the plants.
- Pull the Plants: Carefully lift the whole plant out of the ground, shaking off excess soil.
- Dry the Peanuts: Hang the plants upside down in a dry, shaded area for 1-2 weeks.
- Remove and Store: Once dry, remove the peanuts from the roots and store them in a cool, dry place.
Best Tips for a Successful Peanut Harvest
- Rotate Crops: Avoid planting peanuts in the same spot yearly to prevent soil depletion.
- Improve Pollination: Peanuts self-pollinate, but keeping the soil loose helps pegs develop better.
- Use Companion Planting: Grow basil, marigolds, or beans nearby to repel pests and enrich the soil.
- Control Weeds Early: Weeds compete with peanuts for nutrients, so remove them while they are small.
- Harvest Before Frost: Peanuts are sensitive to frost, so plan harvesting before cold weather sets in.
Common Problems and Solutions
| Problem | Cause | Solution |
|---|---|---|
| Small peanuts | Poor soil or lack of nutrients | Add compost and organic fertilizer |
| Yellowing leaves | Overwatering or poor drainage | Improve drainage and water less |
| Pests on leaves | Aphids, beetles, or caterpillars | Use neem oil or natural sprays |
| Weak plant growth | Lack of sunlight | Ensure full sun exposure |
| No peanut formation | Soil too compact | Loosen soil and use mounding |
Conclusion
Growing peanuts at home is easier than you might think, especially with this alternative method that encourages larger and more abundant tubers. By preparing the soil properly, using mounding techniques, and ensuring consistent care, you can achieve a bountiful peanut harvest for your family. Whether you have a backyard garden, a raised bed, or even large containers, this approach makes it simple to enjoy fresh, homegrown peanuts. Try this method today and discover the joy of harvesting your own delicious peanuts!