How to Grow Super Fruitful Chili Peppers – Don’t Miss These Great Methods!
Chili peppers are a must-have in any home garden, offering both spice and nutrition. Whether you enjoy them fresh, dried, or pickled, growing your own chili peppers ensures a steady supply of these fiery fruits. If you want a super productive chili pepper plant, following the right techniques can significantly increase yield and quality. In this guide, we’ll explore the best methods to grow abundant, healthy chili peppers right at home.
Why Grow Your Own Chili Peppers?
Growing chili peppers at home has several benefits:
- Cost Savings: Homegrown chilies save you from repeated supermarket purchases.
- Better Flavor: Fresh chilies taste superior to store-bought ones.
- Chemical-Free: No harmful pesticides or artificial chemicals.
- Continuous Harvests: With the right care, you can grow chilies year-round.
Choosing the Right Chili Variety
The first step in achieving high yields is selecting the right chili pepper variety. Here are some options based on spice level and growth habit:
- Mild Chilies: Banana peppers, Anaheim peppers
- Medium Spice: Jalapeño, Serrano
- Hot Varieties: Cayenne, Thai chili
- Super Hot: Ghost pepper, Carolina Reaper
Choose a variety that suits your taste preferences and growing conditions.
Best Methods for Growing Super Productive Chili Peppers
1. Starting Seeds the Right Way
- Chili seeds germinate best in warm temperatures (75–85°F/24–29°C).
- Soak seeds in warm water for 12 hours before planting to speed up germination.
- Use seed trays or small pots with a well-draining seed-starting mix.
- Keep soil moist but not soggy and provide indirect light for seedlings.
2. Transplanting for Stronger Growth
- Once seedlings have 2–3 true leaves, transplant them into larger pots or garden beds.
- Space plants 12–18 inches apart to allow for proper airflow.
- Use nutrient-rich, well-draining soil with organic compost.
3. Providing Optimal Sunlight and Temperature
- Chili peppers need 6–8 hours of direct sunlight daily for high productivity.
- Maintain temperatures between 70–85°F (21–29°C) during growth.
- If growing in colder regions, use a greenhouse or indoor grow lights.
4. Proper Watering Techniques
- Water deeply but infrequently, allowing soil to dry slightly between watering.
- Avoid overwatering, as soggy soil can lead to root rot.
- Use mulch to retain moisture and regulate soil temperature.
5. Fertilization for High Yields
- Use a balanced fertilizer (10-10-10) during early growth.
- Once flowering starts, switch to a fertilizer high in phosphorus and potassium (e.g., 5-10-10) to encourage fruit production.
- Apply organic fertilizers like compost tea or fish emulsion every 2–3 weeks.
6. Pruning and Training for More Chilies
- Pinch off the first set of flowers to encourage stronger root development.
- Prune lower leaves to improve airflow and reduce disease risk.
- Support plants with stakes or cages to prevent branches from breaking under heavy fruit loads.
7. Controlling Pests and Diseases
- Aphids and Spider Mites: Spray neem oil or insecticidal soap.
- Fungal Diseases: Avoid overhead watering and space plants properly.
- Whiteflies: Introduce natural predators like ladybugs or use yellow sticky traps.
8. Encouraging Continuous Harvests
- Pick chilies regularly to stimulate more flower and fruit production.
- Harvest when fully mature for maximum flavor and heat.
- If you want milder chilies, harvest while they’re still green.
Storing and Using Your Homegrown Chilies
- Fresh Storage: Store in the refrigerator for up to 2 weeks.
- Drying: Hang in a warm, dry place or use a dehydrator.
- Freezing: Slice and freeze chilies in airtight bags for long-term storage.
- Pickling: Preserve chilies in vinegar for a tangy flavor boost.
Final Thoughts
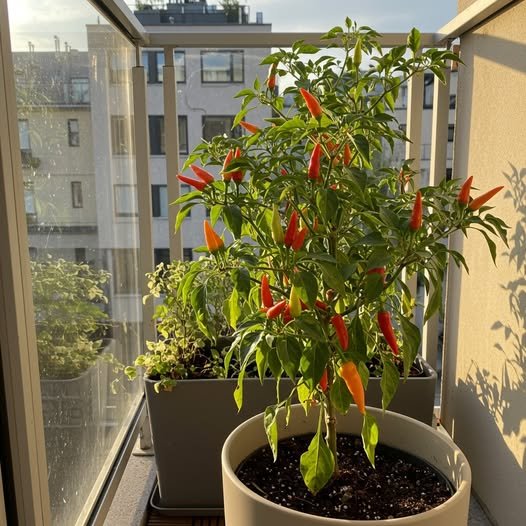
By following these proven methods, you can grow chili peppers that are not only abundant but also healthier and more flavorful than store-bought varieties. Whether you have a garden, a balcony, or just a few pots, these techniques will help you achieve a continuous harvest of fresh chilies. Start planting today and enjoy homegrown spice all year round!